
One tool I easily use everyday in my ancestry research is the computer screenshot application called Snip & Sketch, formerly called Snipping Tool.
All computers have screenshot tools that come on your computer and if you don’t have one you can easily download a screenshot application in your computer apps.
My goal is to show you how easy it is to apply the tool in your Ancestry tree. For teaching purposes I will be using the Microsoft Corporation Snip and Sketch that I use on Windows 10.

Snip & Sketch is a screenshot application to create photos (JPG) of what you see on your computer screen.
One simple way I use the tool in my genealogy research is for index records.
I will walk you through how to make a photo of an index record using the Snip & Sketch application using the websites, FamilySearch and Ancestry®.
Easy Steps to Add a Photo Snip:
- First, if you do not have a free account with FamilySearch, then you will need to signup as it is required to have an account to be able to see the records.
- This is what it looks like when you are signed in on FamilySearch. You will click on the “search” icon and a drop-down menu will appear. This time we will click on “Records“.

- Next in the records search page, I have entered what I wanted to find.
- I have entered: George Scarborough, birth location and birth year. (As seen in the next photo)

- The result is found and now I want to do a screen shot of my FamilySearch record on George Scarborough.
How to Find Snip & Sketch:
- There are a couple of ways to find your Snip & Sketch on your computer
- Click on the Window icon and search on the menu, which is in alphabetical order.

- Type “Snip & Sketch” in the search bar to the right of the windows icon and the best match will pull up.
- Click on the Window icon and search on the menu, which is in alphabetical order.
- Either way, to activate, click on the icon “Snip & Sketch” and it will open. If then you want to pin the icon to your taskbar for future use, all you need to do is right click on the icon on your taskbar then click “pin to taskbar”.

How to Snip:
- Next open the snipping tool and then click “New”
- If you want everything that is on the screen then click “Window, Shift and S” at the same time (This can be particularly useful if it is something that only appears when clicked on or highlighted, like a menu button).

- When you click “New” a “crosshair” will be visible to take the exact snip that you want.
- After the snip you will then click on the save icon, which is on the right hand side and circled in green below.

Adding Photo Snip To Tree:
- Now, I have made my photo snip of the George Scarborough record and will now add it to his page in my tree on Ancestry as a photo or I can also just add it to my Family Tree Maker and mark it private.
- For more detail on how to add a photo, please click this link: How to Add Photo Media to Your Ancestry Tree.
- Lastly, in the description on the photo, there is a really nice feature on Familysearch I like to use that will copy the complete index to cite my source and give credit to Familysearch.
- In the image below that shows the snip of George Scarborough, at the top you will see a button called “Tools”; click that and a drop-down menu will appear.
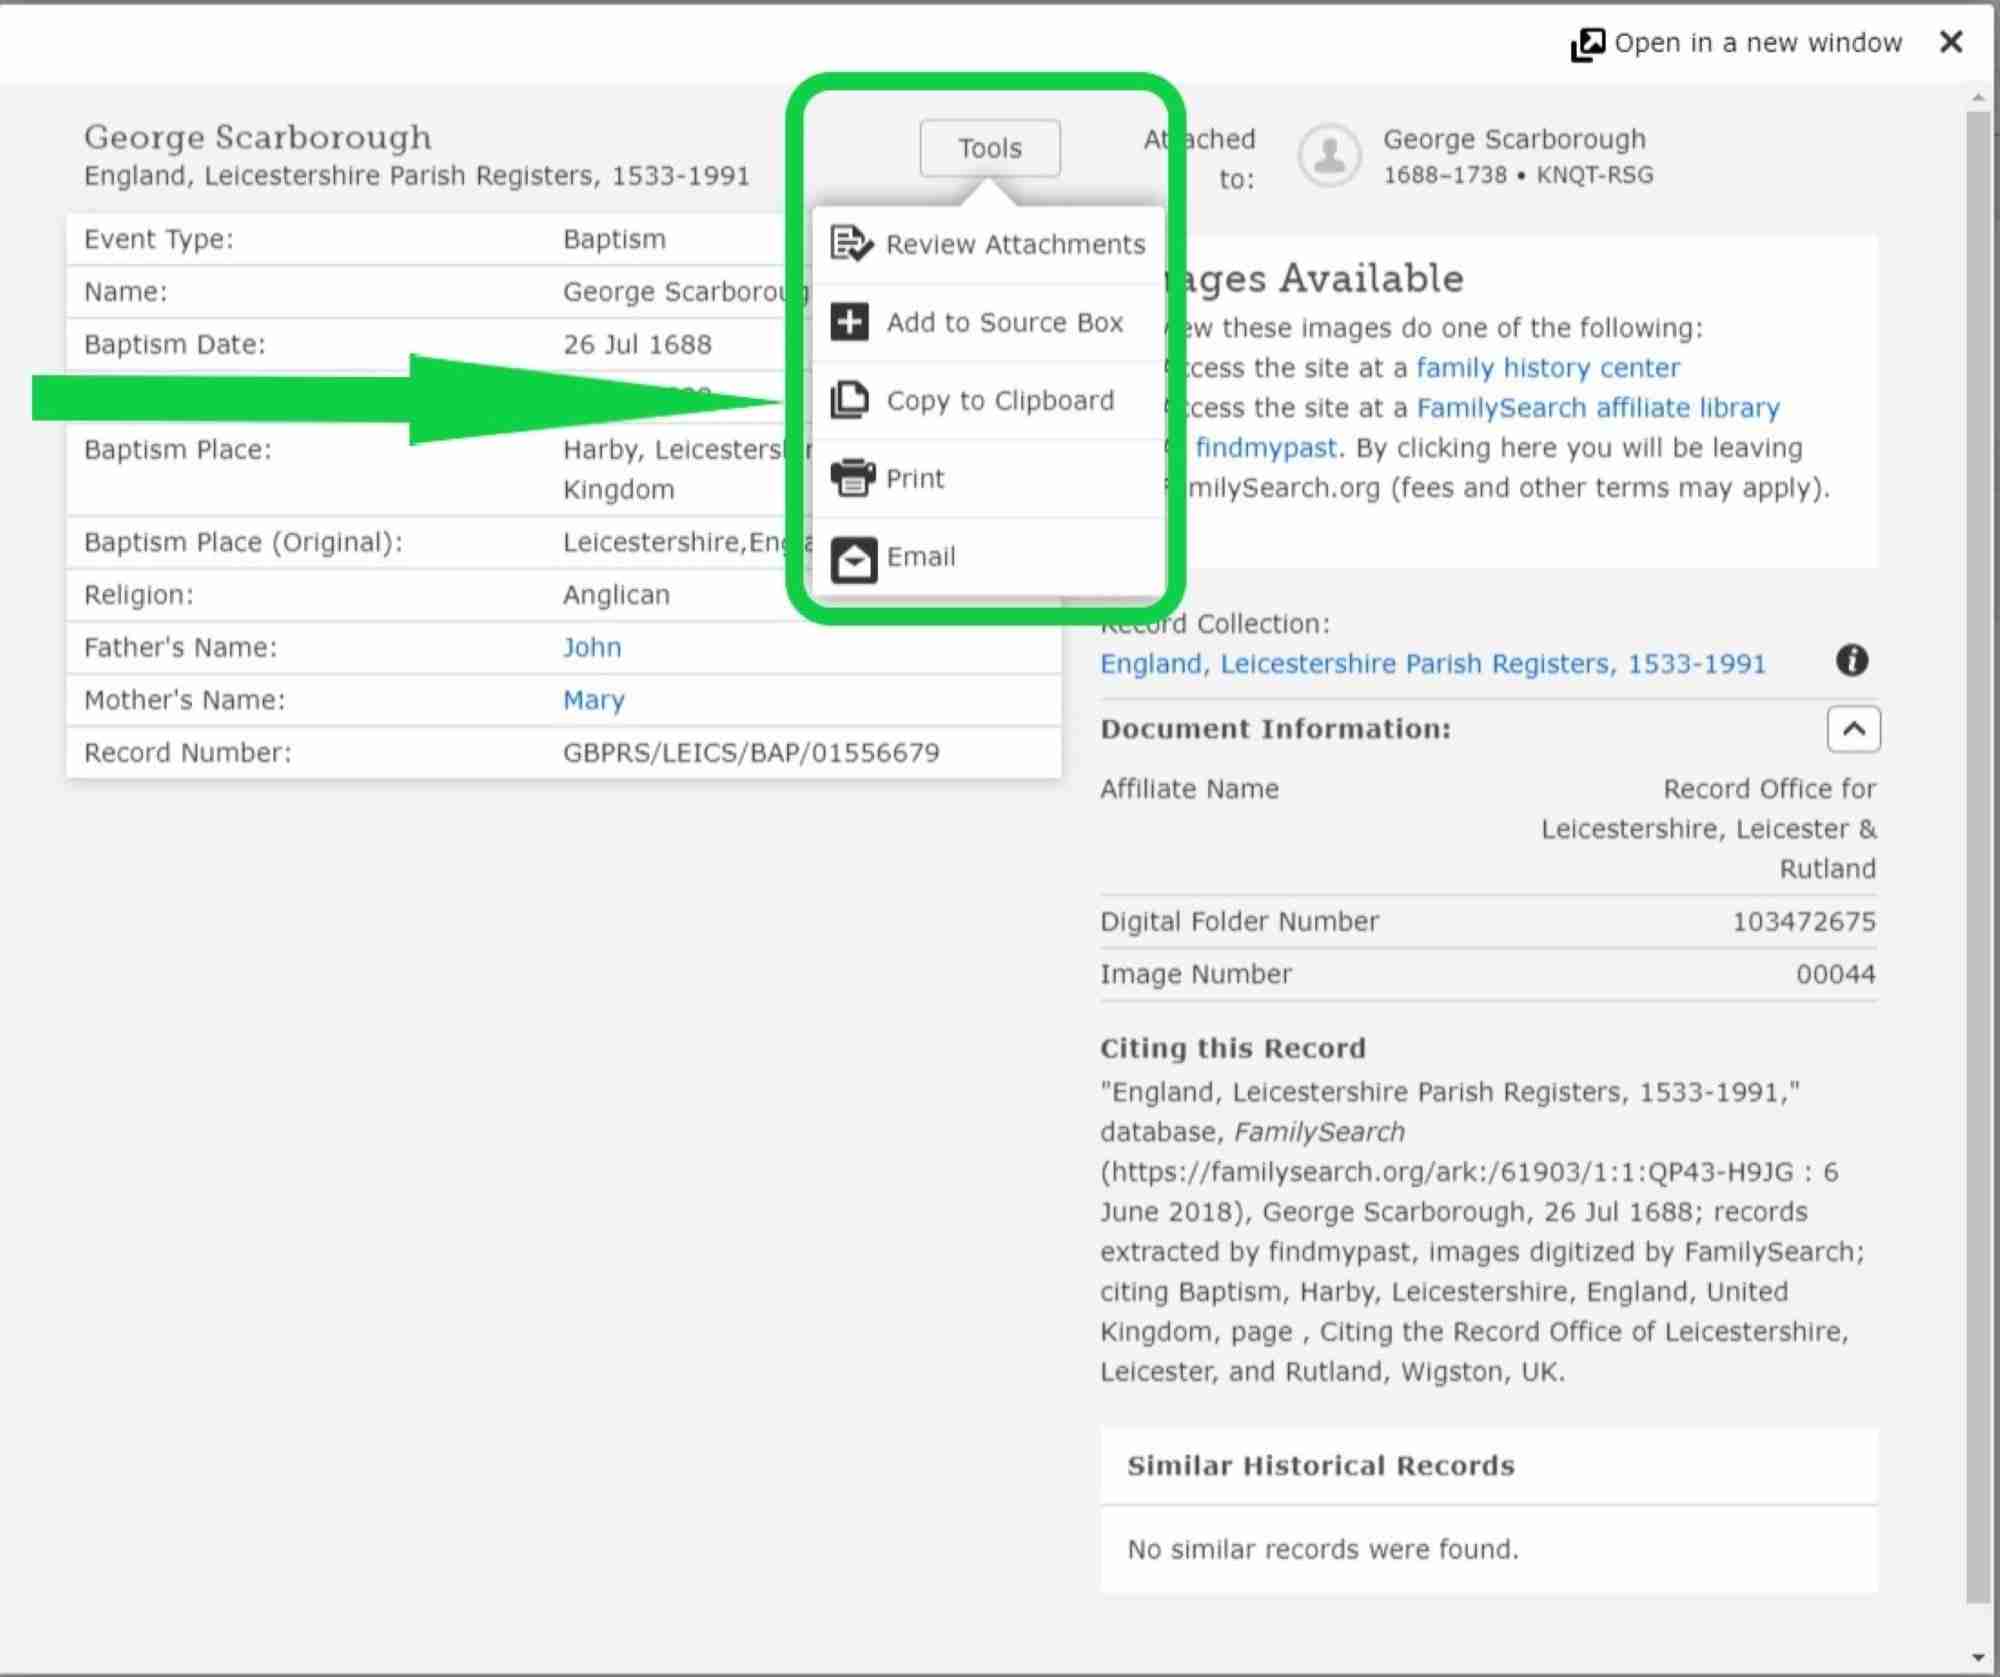
- Click “Copy to Clickboard” and then go back to Ancestry or wherever you are adding the photo and paste what is now on your clipboard to the description.
- All the information that you see for the index was copied and is now added to the description of the photo that I am adding to George Scarborough, which saves a lot of time.
- After pasting, I then add at the bottom the website: “FamilySearch.org” and the date the photo was added to the person.
- Last, click save.

Additional Tips:
- This causes less copy mistakes.
- Remember, when creating the snips, create a folder to house all the snips, photos, or documents for that particular family. This way it will be easier to locate when adding it to your tree.
- Take a good look at the index that is on Ancestry or FamilySearch as it usually gives the film number if it came from FamilySearch.
- The film number and image number will give you the exact location to view the actual image.
- In my example, to view the actual image FamilySearch informs me I have to be signed in to their computer at any of their Family History Centers around the world.
- If I have a subscription to Findmypast, I can also view the actual image.
- To find your nearest Family History Center, click the link: Find a Family History Center — FamilySearch.org
By mastering a screenshot application like Snip & Sketch, you will realize how easy it is to apply it to your ancestry tree, allowing you to save time and improve accuracy for your ancestry records.